A few months ago, I decided to start making yogurt for our own consumption.
I had discovered a farm-made yoghurt (this is the way we spell yoghurt here in Australia) made from full-cream, jersey-cow milk. Unfortunately it is not made from organic milk and is expensive to buy. It is also sold in a plastic container. I'm avoiding food packed in plastic as much as possible, firstly because of fear of contamination and secondly because I find that food stores longer in glass.
From our local independent supermarket I can buy one litre of full-cream, organic milk (pasteurised and unhomogenised) (and yes that's how we spell all three of those words in Australia), for three dollars. I use a Bulgarian style live-culture yoghurt starter which cost about eighty cents to make one litre of yoghurt. This is much cheaper than the six dollars or so that I was paying for 500g of yoghurt from the growers' markets.
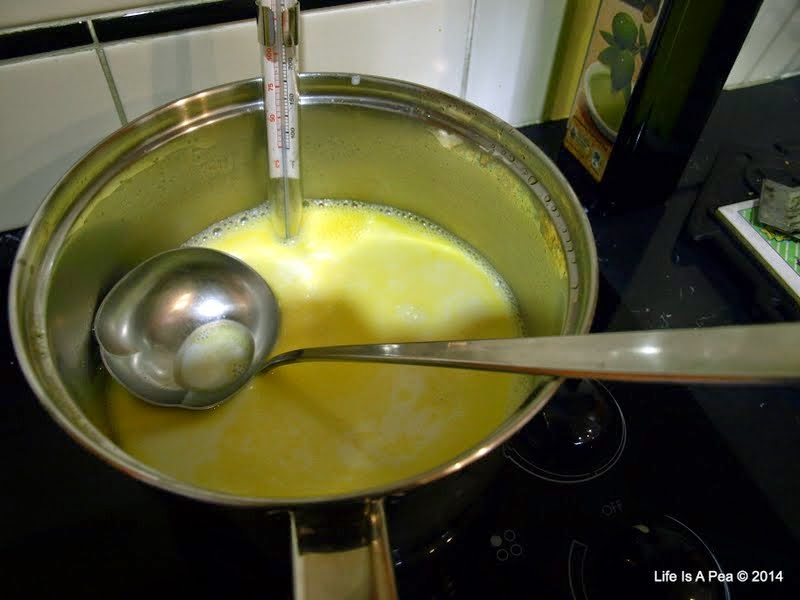
See that yellow stuff floating on top? That's cream.
Some people call it fat and avoid it like crazy. Once the cream is removed from milk, the milk is no longer a whole food. My experience with low fat/skim milk is that it goes off much quicker than full cream milk.
Of course you can make yoghurt from skim or low fat milk...the choice is yours.
Just like when I make our ice cream, I don't use any special equipment to make yoghurt. As I said previously, I don't need another gadget crammed into my already crammed pantry.
If you must make a purchase of a special piece of equipment to make yoghurt, then my suggestion is to make it a sugar thermometer. I did make my first few batches of yoghurt without a thermometer and it turned out fine but a thermometer gives you more control over the temperatures of the milk before adding the live culture.
I now use a thermometer (which I already owned but had forgotten about).
Always make sure you use very clean equipment and jars to store your yoghurt in.
Use stainless steel cookware to heat your milk prior to adding the live culture.
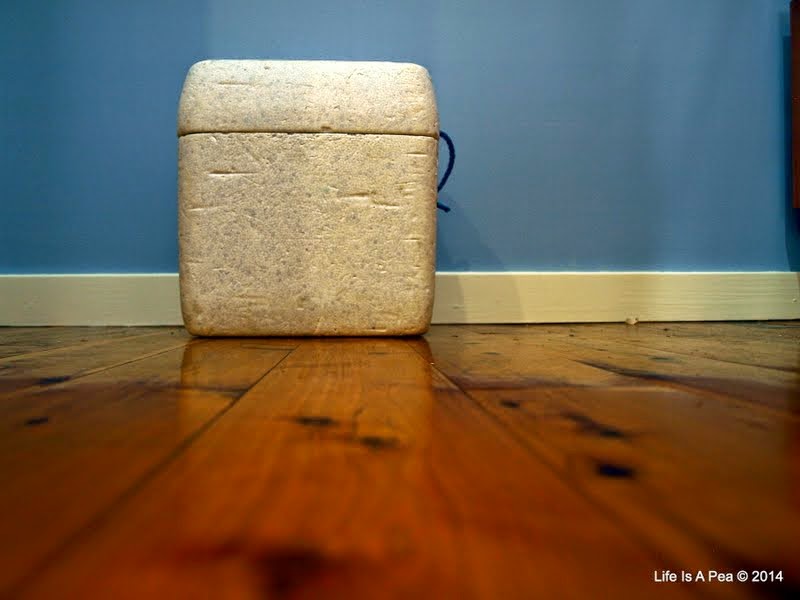
In Australia we have this legendary little container called an 'Esky'. I'm assuming it's derived from the word Eskimo. It has been around for decades and comes in many shapes and sizes. The one above is the cheapest version available. I have had this one for about fourteen years and if my memory serves me right, I think I paid around one dollar for it. This is what I call the "emergency version", that is you purchase one of these in those emergency situations where you just really, really, need a container to keep something very precious, very cold in what probably would be a heat wave situation. It holds six cans of beer beautifully. Or two 500ml glass jars.
Today, you can spend anything up to four hundred dollars to purchase an Esky and some come with wheels and remote controls.
This is the container I use to set my yoghurt in. You may wish to use your oven with the pilot light on. I haven't tried this yet as I'm not really sure what a pilot light is, my oven is fan-forced and I think it might just be too hot even on its lowest setting.
And why would I use an oven when my Esky provides 'free' energy storage which has always served me well?
I warm my clean jars in the oven at the lowest setting. Don't make your jars 'hot', if they are too hot to handle then they are probably too hot for your live cultures. You don't want to kill them.
I also warm up a few clean tea towels and use these to pack tightly around the jars in the Esky to keep them warm for the eight hours setting time.
How to make yoghurt at home:
1. Buy a good quality probiotic yoghurt culture starter from your local health food store.
2. Follow the instructions on the side of the jar.
Yoghurt Making Dos and Don'ts.
DO:
Use clean utensils and equipment.
Warm your glass jars at lowest setting in your oven.
Once set, store in fridge.
DON'T:
Buy specialised equipment to make your yoghurt.
I'm not going to give you instructions on how to make yogurt, because there are already lots of good sites on the WWW telling you how.
You can save a little yoghurt from a previous batch to make your next lot of yoghurt. Some say that the more often you do this the more sour your yogurt will become.
I have made yoghurt using a store-bought natural yogurt for a starter but I found that the yoghurt made from the powdered yoghurt starter produces a much better quality end product.
I use yoghurt as a medicine, that is, I consume it for its probiotic properties.
I am not a yoghurt fan. In fact, the first time I ate yoghurt, I spat it out because I thought it was bad/off. It wasn't, and it was many, many, more years before I gave it another go. My disillusionment with store bought yoghurt stems from all the additives, especially sweeteners/sugars, and that in my store at least, it is becoming almost impossible to purchase a whole-milk yoghurt. Ninety nine percent of them are ninety nine percent fat free, and, ironically, heavily laced with sugar.
This is how I have my yoghurt now:
I make a smoothie most mornings for breakfast.
Recipe
Berry Smoothie
75g frozen berries of your choice (unsweetened)or you may use fresh but I haven't tried using fresh berries as yet.
125g homemade natural yoghurt
granola (optional).
Sorry forgot to add
1 teaspoon each of chia seeds, sunflower seeds and ground almonds.
If you wish to sweeten your smoothie I suggest a teaspoon of maple syrup. I find that I do not need a sweetener.
Place berries, seeds, ground almonds and yoghurt in a bowl and blend with a stick blender or alternatively blend in a blender or food processor until smooth.
Pour into glass and top with granola if using.
I prefer to allow mine to sit for a few minutes to thaw out a bit before eating/drinking.
A point of interest: the longer you set yoghurt, the less lactose it contains (and makes for a more sour yoghurt).
So it is possible to make a lactose free yoghurt at home.